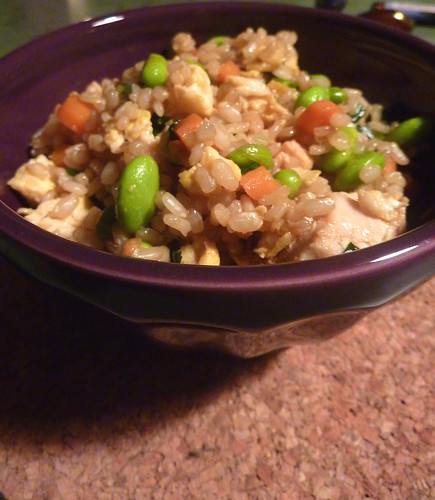
This is very similar to fried rice one would get a Chinese restaurant, however I make a few key substitutions. First, I use brown rice instead of white. Aside from being healthier, I like the texture much better. Brown rice is especially nice when tossed in a frying pan, so it is ideal for this dish. I also substitute edamame (soy beans) for the typical peas. I love peas, but edamame are bigger, tastier, and much more nutritious! One thing I add not ordinarily used at restaurants is red pepper. It adds crunch, color, and a tiny hint of flavor. Nom nom!
So here's an ingredient list, the amounts are not exact!
brown rice (1 cup dry)
shelled edamame (about a cup)
1 small baked chicken breast
2 eggs, scrambled
green onion (one bunch?)
baby carrots (small handful)
bean sprouts (big handful)
soy sauce
splash vegetable oil
SRI RACHA!!!
1. I make the rice in a rice cooker. (Its foolproof...) However, there is ALSO a "foolproof" recipe for brown rice from Cooks Illustrated. This is the one my mom makes all the time, it works perfectly and is MUCH easier than stovetop rice! The recipe can be found here.
2. Prepare! Put the rice on to cook and the chicken breast in the oven. Then, chop the carrots and green onion. Prepare the edamame by the instructions on the bag. Also, scramble your egg slightly undercooked and set it to the side.
3. Sautee them veggies! Get the oil in the pan hot first. I start with the carrots because they need the longest amount of time to soften, and then everything else is up to your preference. I add the bean sprouts last, as I like them to be freshest. Sautee the veggies with a bit of soy sauce and sriracha (if you like your food HOT! Be careful, this stuff is powerful.) Chop the chicken add the egg very last.
4. Add the egg and finally, the rice. Lower heat and stir fry all ingredients together for a few minutes, with soy sauce to taste.
5. Nom, nom, nom nom nom.